Wiring Diagram For Oil Oressure Gauge Vw Bug
Who hates re-wiring your VW?, make it simple with this guide!
The first and most important thing to learn when doing a full re-wire of your VW is the basic rules of wire colouring, and how to read a wiring diagram.
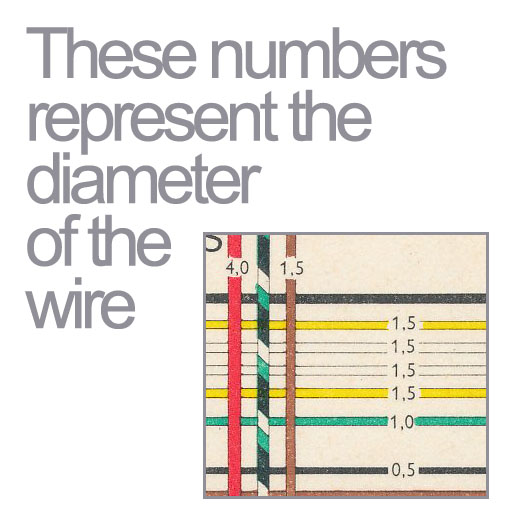
1: Wiring Weight:
It sounds obvious but when identifying a replacement wire, every wiring diagram has a wire size number written somewhere along the length of the wire on the diagram as pictured below, this gives typically the diameter of the wire, it is a quick way of distinguishing if you have say several red wires which you should be using for that section, and insures you don't end up burning anything out from overloading a circuit.
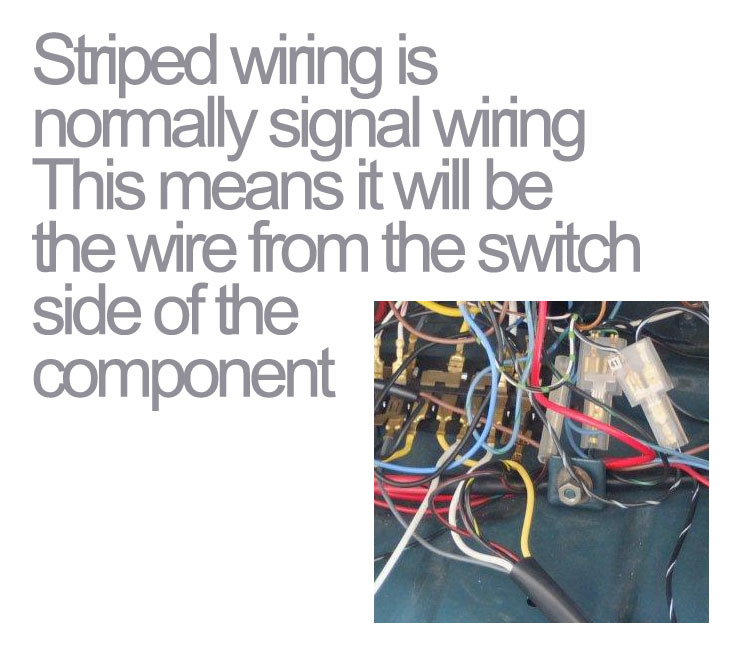
2:Striped or Solids?
One standard rule you will find applies in nearly every case is a striped or two toned wire is a signal wire (will switch something on or off) whereas the solid colours are permanent current wires (Power or Earth).
3: Standard Rules for the Numbers on Relays and Switches:
30 – Typically will connect to a RED wire, permantly Live +
50 – Unfused High Current Switchable Circuit (Used for starter switchable wire)
56, 56a, 56b – Typically a High Current circuit switchable Circuit, (Used for Sidelight as wel as low and High Beam trigger Terminals)
15 – Typically will connect BLACK wire, is used for on IGNITION live circuits, such things as the Coil and Windscreen wipers will connect to this
31, 31b – Nearly always BROWN wire, is used primarily for earthing a circuit
85, 86, 87, 87a – Typically seen on a Low Current/ High Current Trigger Circuit, normally will be on heated window on VW's
4: Reversed circuits, Don't get caught out!
Certain Circuits on Classic Aircooled VW's work on a reverse Live Circuit, the most troublesome is the Oil Pressure, Alternator/ Generator Warning Light and Indicator Arrows. This whole module is live and the earthing of each circuit causes the bulbs to illuminate, whereas with all other components work the opposite way as they are mechanically triggered.
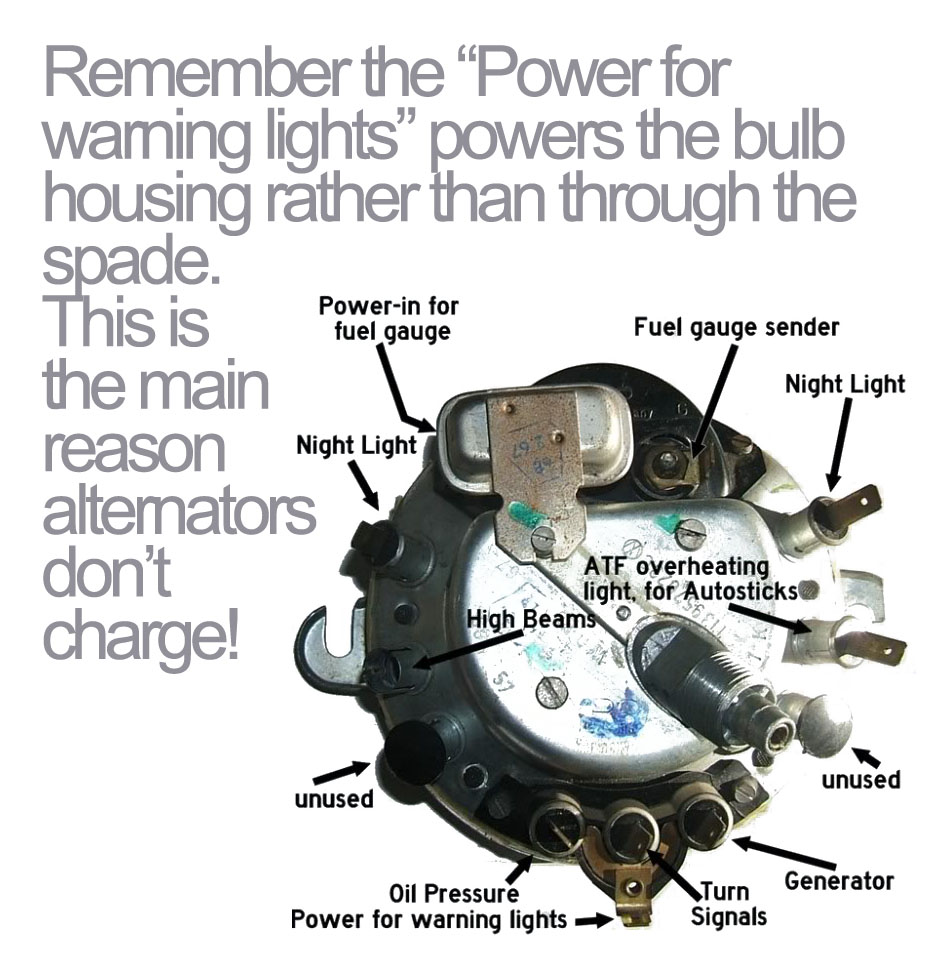
Another point worth making at this point which is very common is people struggling to to get a charge from their alternator or generator, the most common flaw is this wiring being incorrect. Your Alternator will do NOTHING until it recieves at least 4 Volts back feed through the speedometer, so if you have an earth wire on there and no live, likeall the other bulbs, that's the issue!
5: Always use the diagram
Seems obvious, but always download a copy of the wiring diagram for your year and model, remember different models have slight differences as well as Right Hand Drive and Left Hand Drive affects the wiring loom. Even pre-made looms will be missing some small segments so it is worth having the diagram so you can make your own sections.
6: Alternator / Generator Differences
The major difference between old wiring diagrams and new will be around the alternator as nearly all modern looms are premade to use a single pin single spade setup. These utilise a build in regulator instead of the original 12V Regulator, remember when you remove the regulator located under the left rear passenger seat in most models, you simply connect the two main power wires (Normally thick RED wires) together, and the other two together (typically one will be BLUE and quite thin, this is the alternator / generator signal wire).
Source: https://limebug.com/aircooled-vw-wiring-the-most-useful-info/
Posted by: tynishahemmetere0193543.blogspot.com

Post a Comment for "Wiring Diagram For Oil Oressure Gauge Vw Bug"